Solder mask is a crucial component in the printed circuit board (PCB) manufacturing process. It plays a vital role in protecting the board and ensuring the reliability and longevity of electronic devices. In this article, we will dive into what solder mask is, its importance in PCB production, and provide a guide on how to remove solder when necessary.
What is Solder Mask?
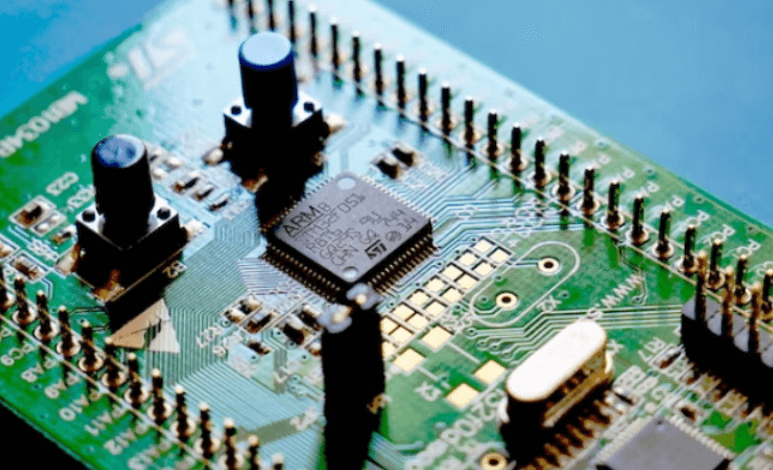
Solder mask, also known as resist, is a protective layer applied to the surface of a PCB. It covers areas of the board that do not need to be soldered, such as the spaces between copper traces, and protects the board from environmental damage, including moisture, dust, and corrosion. Additionally, solder mask prevents solder from bridging between components and shorting out the board during assembly.
Key Functions of Solder Mask:
- Prevents Solder Bridges: By covering areas where solder should not flow, solder mask helps to ensure that soldering only occurs where it is required, minimizing the risk of shorts.
- Electrical Insulation: The mask provides an insulating barrier to prevent electrical shorts between the copper traces.
- Protects the PCB: It safeguards the board from corrosion, oxidation, and physical damage, thereby prolonging its lifespan.
- Improves Aesthetics: Solder mask helps in providing a professional and clean appearance for the PCB. It is typically available in green, although other colors like red, blue, and black are also common.
Materials Used for Solder Mask:
- Liquid Photoimageable Solder Mask (LPI): The most commonly used solder mask, which is applied in liquid form and hardened through UV light exposure.
- Epoxy-based Solder Mask: A durable and highly resistant mask, used for more demanding applications.
- Dry Film Solder Mask: Applied as a film that is laminated onto the PCB and later exposed to UV light for patterning.
How to Remove Solder:
Removing solder is often necessary in PCB repair or rework processes. Whether you are correcting a soldering mistake, removing excess solder, or replacing a component, knowing how to properly remove solder is essential to avoid damaging the PCB.
Methods of Removing Solder:
1. Solder Wick (Desoldering Braid):
Solder wick is a braided copper wire coated with flux. When heated, it absorbs molten solder, which can then be removed from the PCB.
How to Use:
- Place the solder wick over the solder joint you wish to remove.
- Press a heated soldering iron on top of the wick for a few seconds. The heat will cause the solder to melt and be absorbed into the wick.
- Once the solder has been absorbed, remove the iron and wick, then inspect the joint to ensure the solder is removed.
- Repeat if necessary, using fresh wick each time.
- Desoldering Pump (Solder Sucker):
A desoldering pump is a vacuum tool designed to suck up molten solder. It is an effective method for removing solder from joints, especially those that are larger or have more solder.
- How to Use:
- Heat the solder joint with a soldering iron until the solder becomes molten.
- Quickly place the desoldering pump over the joint and activate the pump to suck up the solder.
- Remove the pump and soldering iron and inspect the joint. You may need to repeat the process to remove all the solder.
- Soldering Iron and Manual Removal:
In cases where you need to remove large amounts of solder or work with more complex joints, you can use a soldering iron in combination with a small tool to manually remove the solder.
- How to Use:
- Heat the solder joint with the soldering iron.
- Once the solder is molten, use a small tool (such as tweezers or a small flathead screwdriver) to lift off or remove the excess solder.
- After removal, clean the area with a desoldering braid or by using a flux cleaner to ensure the PCB is free of any remaining solder.
- Solder Removal by Heat Gun (for Large Areas):
When working with large components like QFNs or other multi-lead packages, a heat gun can be used to remove the solder.
- How to Use:
- Set the heat gun to a low temperature setting and aim it at the area you want to desolder.
- Once the solder melts, use tweezers to remove the component.
- Be careful not to overheat the PCB or components, as this can cause damage.
- Chemical Solder Remover:
For more stubborn solder, or in case of heavy, persistent solder bridges, specialized solder removal chemicals can be used. These chemicals are designed to dissolve solder, making it easier to remove.
- How to Use:
- Apply the chemical to the affected area and let it sit for the recommended time.
- Use a soft brush or a small scraper to gently remove the dissolved solder.
- Be sure to clean the board thoroughly with isopropyl alcohol after using chemicals to avoid residue.
Important Tips for Safe and Effective Solder Removal:
- Use the Right Tools: Make sure you are using appropriate tools for the size and type of the solder joint. For example, use a fine desoldering pump for small joints and a heat gun for larger ones.
- Protect the PCB: Be mindful of the heat applied to the PCB during the solder removal process. Too much heat can damage the board or the components.
- Wear Protective Gear: Solder removal often involves working with high temperatures, so it is important to wear safety glasses and work in a well-ventilated area to avoid inhaling fumes.
- Clean Up After Removal: Always clean the board after solder removal to remove any leftover flux or solder residues. This will help ensure the board is ready for rework or new component placement.
Conclusion:
Solder mask is an essential part of the PCB manufacturing process, protecting the board from environmental damage and ensuring reliable performance. Understanding its function and the materials used can help you appreciate its importance in the design and longevity of electronic devices.
In cases where you need to remove solder, various methods, including solder wick, desoldering pumps, heat guns, and solder removal chemicals, are available. Each method has its advantages depending on the situation, and selecting the right one ensures effective solder removal while safeguarding the PCB.
Whether you’re repairing an existing board or designing a new one, mastering solder mask application and solder removal techniques is key to ensuring optimal performance and reliability in your electronic projects.